In this blog, many of my projects can be found. However, you are still not satisfied! You beg and plead for more, but I simply cannot keep up. It just so happens that in this blog, many of my projects are yet to be revealed, and luckily, you can browse through some of my favorite projects in this post. So let's begin!
These bismuth crystals have to be prettiest things I've ever seen and made. The shapes and colors seem too mystical and perfect to form naturally, but all that's required to make them is a pound of molten bismuth and a kitchen stovetop.
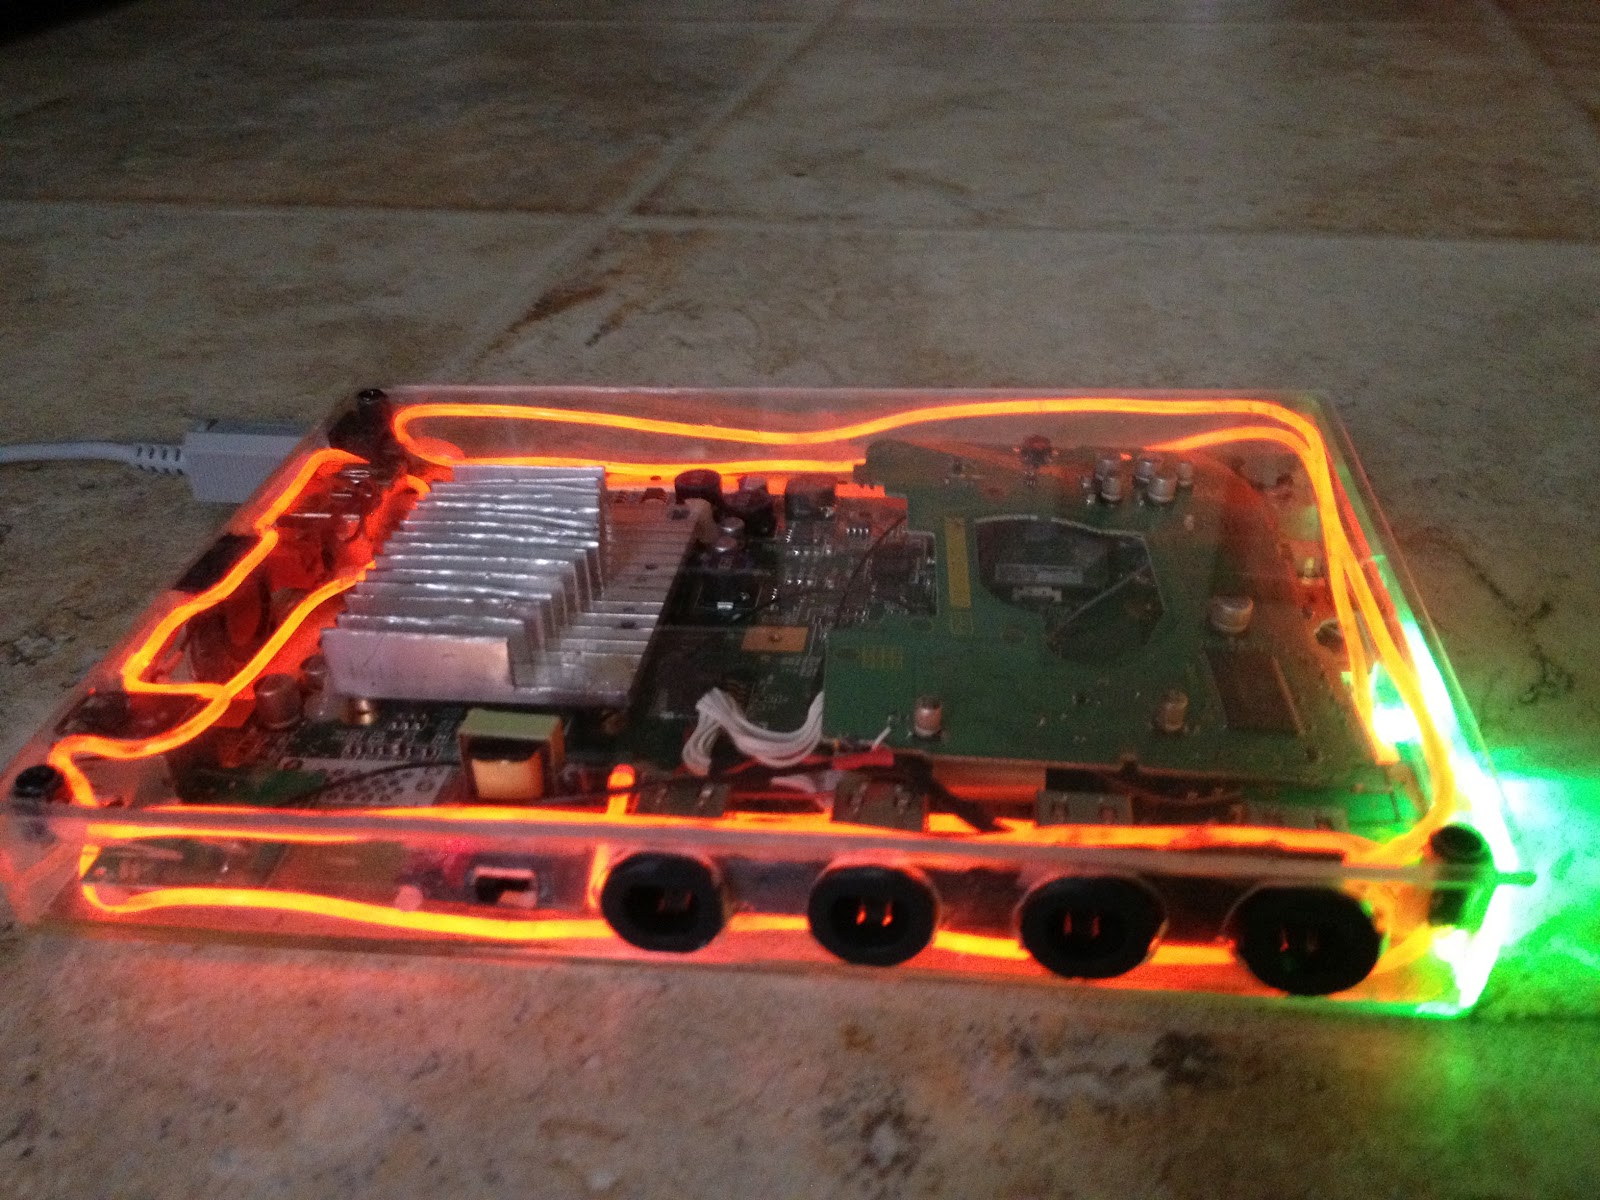
This was a fun weekend project! My friend had a Wii with a broken disc drive and asked me to fix it. Once I took apart the Wii, I realized how much empty space was really in it. I took out the disc drive and memory card port, and measured the dimensions of the remaining parts. I then made a case out of clear acrylic, and added in electroluminescent wire and color changing LEDs for the buttons.
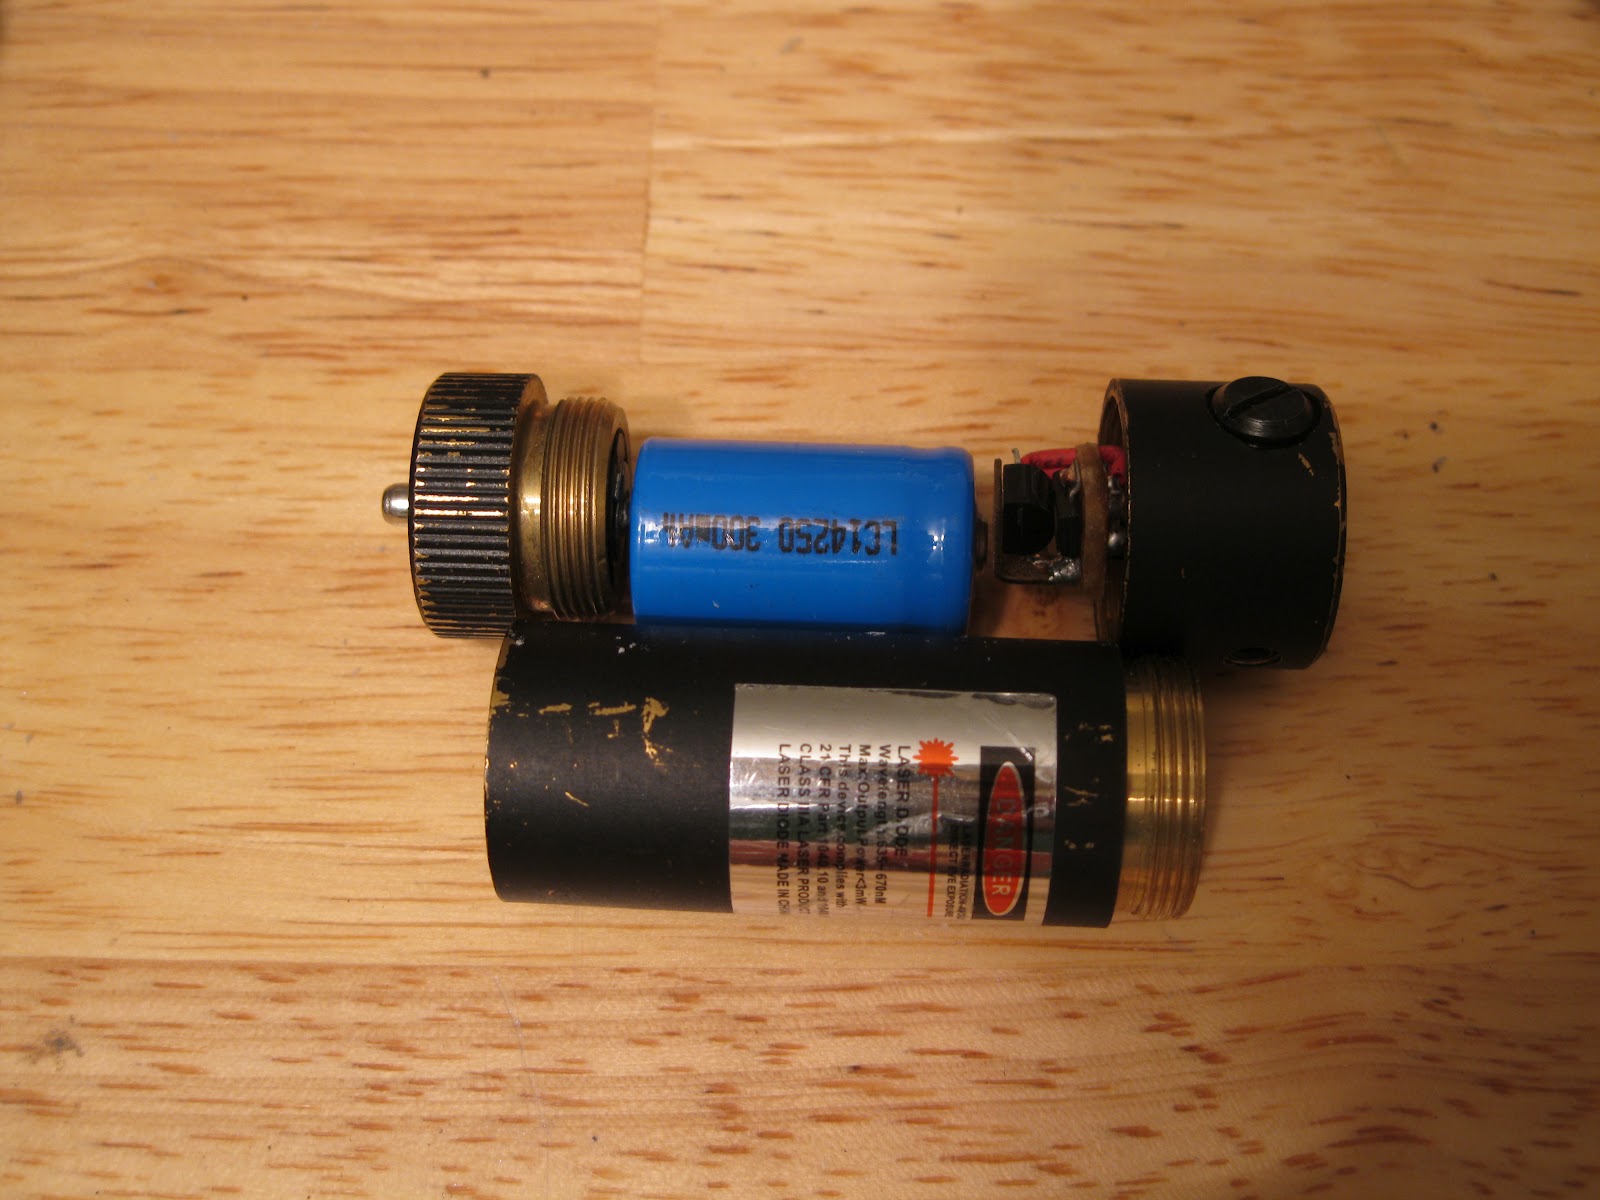
This laser pointer is one of my favorites. It uses a pre-made buck-boost driver that operates on a 4.2V lithium battery. The housing is custom made from aluminum that is designed to heat sink the laser diode. The amazing thing about this laser is that it is single mode at 300mW and 400nm, allowing it to cause small particles to become trapped in the beam. This phenomena is called optical trapping.
In these pictures, you can see my music making studio. Key features are my synthesizer, mixer, and condenser microphone. You can also see the JP8000's logo on a picture frame I built as well as the subwoofer, which is an old guitar amplifier.
Here is a dichromatic lamp I made for a friend. It uses a red LED and a white LED with a blue filter to make the pink hues that shift throughout the circumference of the lamp. The most interesting thing about the lamp is how the top is not covered, so it projects a red and blue circle of light.
This Game Boy may look ordinary, but upon close inspection additional switches can be seen. That's because I modified it with three additional crystal oscillators to allow the user to adjust the speed of the device. The switch on the left side is a single pole four throw switch (SP4T) that has a .5X, 1X, 1.5X, and 2X speed setting. The switches on the right are for switching between Game Boy Color and Game Boy Advance games.
Long ago when I was first interested in lasers, I wanted to build a laser into a Wii controller. I never had the time to do it, so the project was scrapped. About a year ago, I found a candy dispenser that would do the trick. It fits two AAA batteries perfectly, has just enough room for the circuitry, and houses a safety switch that disables operation of the laser. A magnet is attached to the actuator, the "B" button, that activates a reed switch to turn on the red laser.
These two photographs were taken over the summer in Iceland. They display the wonderful and dynamic nature of the place, as well as its beauty. Well, I might not have made these landscapes, but I did take the picture, so that means I get some credit, right?
On the left is a pet mole I created for Mole Day. Dubbed the "Normole," it appears perfectly normal without external intervention. However, when a magnet (disguised as a radioactive food pellet for no particular reason) is placed near the mole's mouth, it slowly lights up in a brilliant display of violet and green, and continues to glow after the magnet is removed.
On the right is a teddy bear with a relatively strange implant. One of my friends wanted to have a laser-embedded teddy bear before going off to college. Nevertheless, it was I who brought life to the teddy bear, who emits a violet beam when one clenches his belly.
On the left we have a voltage regulator that's in the shape of a AAA battery. When my brother was tired of wasting batteries to power a small amplifier, I built this simple circuit to provide the 1.5V needed. It is designed to fit right in place of the battery.
On the right we have a stripped Gamecube controller. Although it looks messy, it has a 555 timer circuit to create a pulsed output that triggers a solid-state relay. The relay then modulates the push of the "A" button, making the game register 30 presses per second. This is activated by pushing on the triple-position pushbutton twice (down, then down again, like a camera's button).
These photos show a gorgeous indigo laser that I made. The case was bought online from a laser retailer, but the inside components were custom made. The laser is retrofitted with a small aperture to reduce the size of the beam. Its 445nm color allows it to cause certain objects to fluoresce, such as fluorescein and the dyes in glow sticks as seen in the second picture. Also seen is the DLP chip of an old projector, which works great as a reflective diffraction grating. It is placed on an old duck that I made in the seventh grade.
Here is a CD holder with flickering yellow LEDs and a blue LED in the spindle. It is powered by 4.5V and makes a nice decoration in my friend's room. The LEDs independently flicker in various locations around the CDs, making a lightning-esque display. It also works as a night-light.
The final creation that is seen here is the smallest laser pointer I've ever built. For being 60mm long and 20mm wide, it has quite a powerful beam. It uses a small focal length lens (about 2mm, the lens is about 4mm in diameter) to make the diameter of the beam smaller. In the picture on the right, the Altoids laser (seen in a previous blog post) has a standard 4-5mm beam while the micro red laser has a 1mm beam.
That, my friends, is all for today! Hope you enjoyed the photos!
Grant